In this Laravel tutorial titled “laravel 12 custom validation rules example”, you will learn how to create custom validation rules step by step with example. We’ll explore different ways to implement custom validation in Laravel, including using Rule objects and using Closures.
Form validation is a crucial part of any Laravel project, and Laravel 12 makes it easy to handle. However, sometimes the built-in validation rules are not enough for your specific requirements. That’s where custom validation rules become essential.
Table of Contents
What Are Custom Validation Rules?
Custom validation rules let you create your own rules for checking data when Laravel’s built-in rules are not enough. They are useful for things like:
- Validating complex business logic
- Checking data with external APIs
- Making sure multiple fields work together correctly
- Validating special data formats for your domain
- Handling conditional validation depending on other values
Creating Custom Validation Rules
Laravel 12 provides two primary methods for creating custom validation rules: Rule Objects and Closures.
Method 1: Using Rule Objects (Recommended)
Rule objects are the best way to create validation logic that you can reuse in different parts of your app. They use the ValidationRule interface, which was introduced in Laravel 9 and improved in Laravel 12.
Step 1: Generate a Custom Rule
Run the below artisan command to generate a new custom validation rule:
php artisan make:rule UsernameRule
This command will generate a file UsernameRule.php inside App\Rules folder.
<?php

namespace App\Rules;

use Closure;
use Illuminate\Contracts\Validation\ValidationRule;

class UsernameRule implements ValidationRule
{
    /**
     * Run the validation rule.
     *
     * @param  \Closure(string, ?string=): \Illuminate\Translation\PotentiallyTranslatedString  $fail
     */
    public function validate(string $attribute, mixed $value, Closure $fail): void
    {
        //
    }
}
Read Also : Laravel 12 Summernote Image Upload CRUD Example
Update app/Rules/UsernameRule.php file
This is the updated version of custom validation rules. In previous versions, the passes method was used for attribute validation logic and the message method for displaying error messages. Now, it uses the one single validate method to handle both the validation logic and the error message when validation fails.
<?php

namespace App\Rules;

use Closure;
use Illuminate\Contracts\Validation\ValidationRule;

class UsernameRule implements ValidationRule
{


    /**
     * Run the validation rule.
     *
     * @param  \Closure(string, ?string=): \Illuminate\Translation\PotentiallyTranslatedString  $fail
     */
    public function validate(string $attribute, mixed $value, Closure $fail): void
    {


        // Check for valid characters

            $pattern = '/^[a-zA-Z_\-\.]+$/';


        if (!preg_match($pattern, $value)) {
            $fail("The {$attribute} contains invalid characters.");
            return;
        }
    }
}
Step 2: Use Validation Rule in Controller
Once the rule is created, you can use it in your validator by adding the rule object instance alongside your other validation rules (e.g., ‘username’ => [‘required’, ‘string’, new UsernameRule]).
<?php

namespace App\Http\Controllers;

use Illuminate\Http\Request;
use Illuminate\View\View;
use Illuminate\Http\RedirectResponse;
use App\Rules\UsernameRule;

class UserController extends Controller
{
     /**
     * Show the application dashboard.
     *
     * @return \Illuminate\Http\Response
     */
    public function create(): View
    {
        return view('form');
    }

     /**
     * Show the application dashboard.
     *
     * @return \Illuminate\Http\Response
     */
    public function store(Request $request): RedirectResponse
    {
        $validatedData = $request->validate([
                'username'=>['required', 'string', new UsernameRule],

            ]);

        return back()->with('success', 'User created successfully.');
    }
}
Step 3: Add Routes
In this step, we define two routes — one for displaying the view and another for handling validation and returning a response message.
<?php

use Illuminate\Support\Facades\Route;
use App\Http\Controllers\UserController;

Route::get('custom-validation', [UserController::class, 'create']);
Route::post('custom-validation', [UserController::class, 'store'])->name('validate');
Step 4: Create Blade to Test Validation
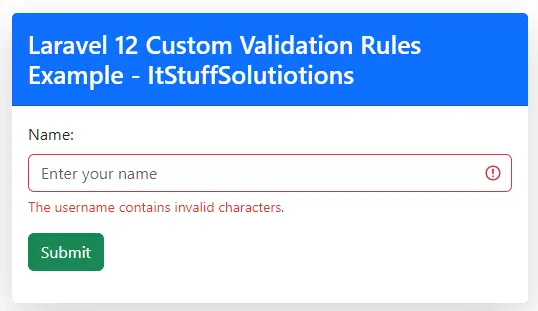
In this step, we create a Blade view file at resources/views/form.blade.php containing a username input field, styled with Bootstrap 5.3.
<!DOCTYPE html>
<html lang="en">
<head>
    <title>Laravel 12 Custom Validation Rules Example - ItStuffSolutiotions</title>
    <meta charset="utf-8">
    <meta http-equiv="X-UA-Compatible" content="IE=edge">
    <meta name="viewport" content="width=device-width, initial-scale=1">

    <!-- Bootstrap 5.3.8 CSS -->
    <link href="https://cdn.jsdelivr.net/npm/bootstrap@5.3.8/dist/css/bootstrap.min.css" rel="stylesheet">
</head>
<body>
<div class="container">
    <div class="card mt-5 shadow-lg border-0">
        <h3 class="card-header p-3 bg-primary text-white">
            Laravel 12 Custom Validation Rules Example - ItStuffSolutiotions
        </h3>
        <div class="card-body">
            @session('success')
            <div class="alert alert-success alert-dismissible fade show" role="alert">
                    {{ session('success') }}
                    <button type="button" class="btn-close" data-bs-dismiss="alert" aria-label="Close"></button>
                </div>
            @endsession
            <form method="POST" action="{{ route('validate') }}">
                @csrf

                <div class="mb-3">
                    <label class="form-label" for="username">Name:</label>
                    <input
                        type="text"
                        name="username"
                        id="username"
                        class="form-control @error('username') is-invalid @enderror"
                        placeholder="Enter your name">

                    @error('username')
                        <div class="invalid-feedback">{{ $message }}</div>
                    @enderror
                </div>


                <div class="mb-3">
                    <button class="btn btn-success btn-submit">Submit</button>
                </div>
            </form>
        </div>
    </div>
</div>

<!-- Bootstrap 5.3.8 JS (with Popper) -->
<script src="https://cdn.jsdelivr.net/npm/bootstrap@5.3.8/dist/js/bootstrap.bundle.min.js"></script>
</body>
</html>
Step 5: Run the Test
In this step, we will test our custom validation. Open your terminal or command prompt and run the command below to start the Laravel development server.
php artisan serve
Now, visit http://127.0.0.1:8000/custom-validation and enter a username containing numbers — you’ll see an error message as shown in the image below.
Use when:
- You need reusable validation logic across multiple forms or controllers.
- The validation is complex and may grow over time.
- You want to separate validation logic from controllers for cleaner code.
Method 2: Using Closures
For one-time validation logic, closures provide a quick solution:
<?php

namespace App\Http\Controllers;

use Closure;
use Illuminate\View\View;
use Illuminate\Http\Request;
use Illuminate\Http\RedirectResponse;

class UserController extends Controller
{
     /**
     * Show the application dashboard.
     *
     * @return \Illuminate\Http\Response
     */
    public function create(): View
    {
        return view('form');
    }

     /**
     * Show the application dashboard.
     *
     * @return \Illuminate\Http\Response
     */
    public function store(Request $request): RedirectResponse
    {
        $validatedData = $request->validate([
                'username'=>['required', 'string',  function (string $attribute, mixed $value, Closure $fail) {
                        if (!preg_match('/^[a-zA-Z]+$/', $value)) {
                            $fail('The ' . $attribute . ' must contain only letters.');
                        }
                    },
                ],

            ]);

        return back()->with('success', 'User created successfully.');
    }
}
Use when:
- You need quick, one-off validation for a specific form or controller.
- The validation is simple or unique and won’t be reused.
- You want inline logic without creating a separate class.
Conclusion
In this tutorial, we explored Laravel 12 custom validation rules step by step. You learned how to create reusable validation logic using Rule objects and quick, one-off validation using Closures. Custom validation rules are essential when Laravel’s built-in rules are not enough to handle your specific requirements, such as validating complex business logic, multiple field dependencies, external API data, or special data formats.
By following this example, you now know how to:
- Generate and define a custom validation rule using php artisan make:rule.
- Implement validation logic using the validate method in Laravel 12.
- Attach your custom rule to a validator in controllers.
- Display validation errors and success messages in a Blade view styled with Bootstrap 5.3.
- Test your validation rules by running the Laravel development server.
With these skills, you can create more robust, tailored validation for your Laravel applications, ensuring that your forms and data input meet your exact requirements.
