In this Laravel 12 tutorial titled “Laravel 12 restrict/block user access from ip address”, you’ll learn how to restrict or block users based on their IP address. This is a useful technique when you want to prevent certain users, bots, or locations from accessing your Laravel application — improving your app’s security and control.
To restrict or block user access by IP address in Laravel 12, create a custom middleware that checks incoming requests against a list of blocked IPs and denies access if a match is found. This is a common and effective technique to enhance application security, prevent abuse, or limit access to specific regions or users.
Table of Contents
Why Restrict IP Addresses?
Blocking IP addresses can help you:
- Prevent malicious users or bots from attacking your site.
- Restrict access to internal or admin routes.
- Control user access from specific countries or networks.
- Reduce server load from unwanted requests.
Laravel provides flexible ways to handle this using middleware.
Prerequisites
- Laravel 12 project installed
- PHP 8.2+ and Composer
- Basic knowledge of middleware
- Local server (XAMPP, Laragon, Sail)
Read Also : How to Create Middleware with Parameters in Laravel 12
Step 1: Create a New Middleware
First, create a custom middleware that will check the user’s IP address.
php artisan make:middleware RestrictedIpsMiddleware
This command will create a new middleware file in the directory: app/Http/Middleware/RestrictedIpsMiddleware.php
Read Also : Laravel 12 How to Get Client IP Address Example
Step 2: Implement Specific IP Blocking Logic
Edit the generated middleware file, and define an array of blocked IPs. Then, check each request against this list:
<?php
namespace App\Http\Middleware;
use Closure;
use Illuminate\Http\Request;
use Symfony\Component\HttpFoundation\Response;
class RestrictedIpsMiddleware
{
/**
* Handle an incoming request.
*
* @param \Closure(\Illuminate\Http\Request): (\Symfony\Component\HttpFoundation\Response) $next
*/
public function handle(Request $request, Closure $next): Response
{
// Define Restricted IP addresses
$restrictedIps = [
'123.456.789.000',
'111.222.333.444',
'127.0.0.1'
];
if (in_array($request->ip(), $restrictedIps)) {
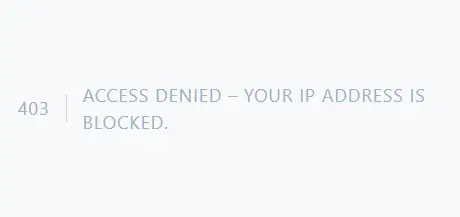
// Return 403 Forbidden response
abort(403, 'Access denied – Your IP address is blocked.');
}
return $next($request);
}
}
Here, you can list all IP addresses that you want to block in the $restrictedIps array.
This logic aborts the request with a 403 Forbidden response if the IP is restricted.
Step 3: Register the Middleware
In Laravel 12 or 11, register your middleware in bootstrap/app.php.
Option 1: Global Middleware
To apply the middleware globally and block IPs on all routes, use the code below. This way, you don’t need to specify the middleware in your routes file — it will automatically apply to every route.
<?php

use Illuminate\Foundation\Application;
use Illuminate\Foundation\Configuration\Exceptions;
use Illuminate\Foundation\Configuration\Middleware;
use App\Http\Middleware\RestrictedIpsMiddleware;

return Application::configure(basePath: dirname(__DIR__))
    ->withRouting(
        web: __DIR__.'/../routes/web.php',
        commands: __DIR__.'/../routes/console.php',
        health: '/up',
    )
    ->withMiddleware(function (Middleware $middleware) {
           $middleware->append(RestrictedIpsMiddleware::class);

    })
    ->withExceptions(function (Exceptions $exceptions) {
        //
    })->create();
Option 2: Route Middleware
If you want to apply it to a specific route or a group of routes, use this method to register the middleware.
<?php

use Illuminate\Foundation\Application;
use Illuminate\Foundation\Configuration\Exceptions;
use Illuminate\Foundation\Configuration\Middleware;

return Application::configure(basePath: dirname(__DIR__))
    ->withRouting(
        web: __DIR__.'/../routes/web.php',
        commands: __DIR__.'/../routes/console.php',
        health: '/up',
    )
    ->withMiddleware(function (Middleware $middleware) {
             $middleware->alias([
            'block.ip' => \App\Http\Middleware\RestrictedIpsMiddleware::class,
        ]);

    })
    ->withExceptions(function (Exceptions $exceptions) {
        //
    })->create();
Step 4: Apply Middleware to Routes
This step is required only if you’ve registered the middleware for specific routes, as explained in Option 2. Apply it in your routes/web.php file as shown below:
<?php

use Illuminate\Support\Facades\Route;
use App\Http\Controllers\LocationController;

Route::get('/', function(){
    return view('welcome');
});
//apply on specific route
//Route::get('/show', [LocationController::class, 'show'])->middleware('block.ip');

//apply a group of routes
Route::middleware('block.ip')->group(function () {

Route::get('/show', [LocationController::class, 'show']);
Route::get('/test', [LocationController::class, 'test']);

});
Now, only allowed IPs will be able to access the /show and /test routes.
Step 5: Test Your Application
Run your Laravel development server:
php artisan serve
Visit your site from a blocked IP you should see:
Access denied – Your IP address is blocked.
If your IP is not blocked, you’ll be able to access the application normally.
Read Also : Laravel 12 How to Get User Location from IP Address Example
Tips and Best Practices
- Store blocked IPs in a config file or database for easier management if your requirements change frequently.
- Consider maintaining a whitelist if you want tight access control.
- For advanced needs, third-party firewall packages and services can provide automated rule management, dynamic banning, and logging.
Conclusion
In this Laravel 12 tutorial, you learned how to restrict or block access from specific IP addresses using custom middleware.
This is an effective way to protect your Laravel application from unwanted traffic and maintain better security control.
Whether you apply it globally or to specific routes, Laravel makes it easy to handle IP-based access restrictions with just a few lines of code.
Always keep users informed when access is restricted, especially if there’s a chance of false positives.
