
In this Laravel tutorial, you will learn how to import large Excel and csv files in laravel 12 complete guide step-by-step.
Importing bulk data from Excel files is a critical feature in many real-world applications. Whether you’re managing user registrations, inventory updates, or financial records, Laravel’s Maatwebsite package provides a robust, performant solution for handling large Excel imports. This comprehensive guide covers everything you need to implement efficient Excel data imports in Laravel 12.
In this article, you will learn how to use Maatwebsite in Laravel 12 to import large data from Excel files, using best practices such as chunk reading, batch inserts, and queue processing.
Table of Contents
Why Use Maatwebsite for Large Excel Imports?
Maatwebsite Laravel Excel is the most popular package for handling Excel and CSV files in Laravel. It offers several advantages when working with large data:
- Supports Excel and CSV formats
- Chunk-based reading for memory efficiency
- Queue support for background processing
- Batch inserts for faster database operations
- Clean and maintainable import classes
For large files, these features are essential to avoid server timeouts and performance bottlenecks.
Step 1: Install Laravel Project
Run the given command below to create a new laravel project:
composer create-project laravel/laravel import-excel
You can skip this step if you have already installed.
Step 2: Install Maatwebsite Laravel Excel Package
Open your terminal and run:
composer require maatwebsite/excel
This command downloads both the Maatwebsite/Excel package and its dependency, PhpSpreadsheet, which handles the underlying Excel file parsing and package automatically registers its service provider in Laravel 12.
Read Also : Laravel 12 Yajra DataTables Tutorial Step-by-Step Guide
Step 3: Create Import Class
Generate an import class:
php artisan make:import UsersImport --model=User
This command creates app/Imports/UsersImport.php with a basic structure.
<?php

namespace App\Imports;

use App\Models\User;
use Illuminate\Support\Facades\Hash;
use Maatwebsite\Excel\Concerns\ToModel;
use Maatwebsite\Excel\Concerns\WithChunkReading;
use Illuminate\Contracts\Queue\ShouldQueue;
use Maatwebsite\Excel\Concerns\WithBatchInserts;
use Maatwebsite\Excel\Concerns\WithHeadingRow;

class UsersImport implements ToModel,WithHeadingRow,WithBatchInserts,WithChunkReading,ShouldQueue
{
    /**
    * @param array $row
    *
    * @return \Illuminate\Database\Eloquent\Model|null
    */
    public function model(array $row)
    {
        return new User([
            'name'     => $row["name"],
            'email'    => $row["email"],
            'password' => Hash::make($row['password'] ?? 'password123'),
        ]);
    }

    public function batchSize(): int
    {
        return 50;
    }

    public function chunkSize(): int
    {
        return 50;
    }
}
Key Components:
- ToModel Interface: Converts each Excel row to a model instance
- WithHeadingRow Interface: Treats the first row as column headers, allowing you to access data by column name instead of array index
- model() Method: Receives an array representing one row of data and returns a model instance to be saved
- WithHeadingRow : Without it, you access columns by index (0, 1, 2) instead of column names
Why This Works for Large Data
- Chunk reading prevents memory overload
- Batch inserts reduce database queries
- Queue processing avoids request timeouts
Optimizing for Large Data Sets
Importing hundreds of thousands of rows requires optimization. Standard row-by-row inserts are inefficient and memory-intensive. Maatwebsite provides several mechanisms to handle large imports gracefully.
Strategy 1: Batch Inserts
Batch inserts group multiple database insertions into single queries, dramatically reducing database overhead.
Performance Impact: With 1,000 rows and a batch size of 50, you reduce database queries from 1,000 to just 20.
Strategy 2: Chunk Reading
Chunk reading processes the Excel file in segments, preventing the entire file from being loaded into memory at once. This is crucial for files exceeding 100MB.
Strategy 3: Combining Batch Inserts and Chunk Reading
Using both strategies together delivers the best performance for massive datasets.
Queue-Based Imports for Very Large Files
For files exceeding 50,000 rows or imports that take more than 30 seconds, process them asynchronously using Laravel’s queue system.
Your users immediately receive confirmation while the import processes in the background.
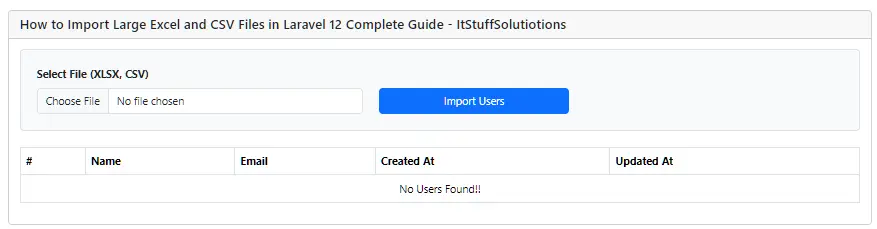
Step 4: Create File Upload Form
Create a simple upload form for users to submit Excel files. resources/views/import.blade.php
<!DOCTYPE html>
<html>
<head>
    <title>How to Import Large Excel and CSV Files in Laravel 12 Complete Guide</title>
    <link href="https://cdn.jsdelivr.net/npm/bootstrap@5.3.8/dist/css/bootstrap.min.css" rel="stylesheet">
</head>
<body>
    <div class="container mt-5">
        <div class="card">
            <h5 class="card-header">How to Import Large Excel and CSV Files in Laravel 12 Complete Guide - ItStuffSolutiotions</h5>
            <div class="card-body">
                 <!-- Success/Error Messages -->
            @if(session('success'))
                <div class="alert alert-success">{{ session('success') }}</div>
            @endif
            @if(session('error'))
                <div class="alert alert-danger">{{ session('error') }}</div>
            @endif
            @if($errors->any())
                <div class="alert alert-danger">
                    <ul class="mb-0">
                        @foreach($errors->all() as $error)
                            <li>{{ $error }}</li>
                        @endforeach
                    </ul>
                </div>
            @endif

            <!-- Import Form -->
            <form action="{{ route('users.import') }}" method="POST" enctype="multipart/form-data" class="mb-4 border p-4 rounded bg-light">
                @csrf
                <div class="row align-items-end">
                    <div class="col-md-5">
                        <label class="form-label fw-bold">Select File (XLSX, CSV)</label>
                        <input type="file" name="file" class="form-control" required>
                    </div>
                    <div class="col-md-3">
                        <button type="submit" class="btn btn-primary w-100">Import Users</button>
                    </div>

                </div>
            </form>

                <table class="table table-bordered data-table">
                    <thead>
                        <tr>
                            <th>#</th>
                            <th>Name</th>
                            <th>Email</th>
                            <th>Created At</th>
                            <th>Updated At</th>
                        </tr>
                    </thead>
                     @forelse($users as $user)
                    <tr>
                        <td>{{ $user->id }}</td>
                        <td>{{ $user->name }}</td>
                        <td>{{ $user->email }}</td>
                        <td>{{ $user->created_at->format('d M Y') }}</td>
                        <td>{{ $user->updated_at->format('d M Y') }}</td>
                    </tr>
                    @empty
                    <tr>
                        <td colspan="5" class="text-center">No Users Found!!</td>
                    </tr>
                    @endforelse
                </table>
                 <!-- Pagination -->
            <div class="d-flex justify-content-center">
                {{ $users->links() }}
            </div>
            </div>
        </div>
    </div>
    <script src="https://cdn.jsdelivr.net/npm/bootstrap@5.3.8/dist/js/bootstrap.bundle.min.js"></script>


</body>

</html>
Read Also : Laravel 12 How to Integrate ChatGPT API Example
Step 5: Handle Import in Controller
Create controller:
php artisan make:controller UserController
The controller handles file uploads and triggers the import process. Update controller:
<?php

namespace App\Http\Controllers;

use Illuminate\Http\Request;
use App\Imports\UsersImport;
use Maatwebsite\Excel\Facades\Excel;
use App\Models\User;

class UserController extends Controller
{
    public function index(){

        $users = User::latest()->paginate(10);
        return view('import',compact('users'));
    }


    /**
    * Import data from Excel/CSV
    */
    public function import(Request $request)
    {
        $request->validate([
            'file' => 'required|mimes:xlsx,xls,csv|max:2048',
        ]);

        try {
            Excel::import(new UsersImport, $request->file('file'));
            return back()->with('success', 'Users imported successfully!');
        } catch (\Exception $e) {
            return back()->with('error', 'Error importing file: ' . $e->getMessage());
        }
    }
}
Step 6: Define Routes
<?php

use Illuminate\Support\Facades\Route;
use App\Http\Controllers\UserController;

Route::controller(UserController::class)->group(function(){
    Route::get('users', 'index')->name('users.index');
    Route::post('users/import', 'import')->name('users.import');
});
Step 7: Configure Queue for Large Imports
Large Excel imports should always run in the background.
Update your .env file:
QUEUE_CONNECTION=database
Make sure your queue system is configured (database, redis, etc.). Here i am using database.
Create queue tables and migrate:
php artisan queue:table
php artisan migrate
Step 8: Run the Laravel App
Start the Laravel development server:
php artisan serve
Then, Start the queue worker:
php artisan queue:work
Now open your browser and go to this url : http://127.0.0.1:8000/users
Key Takeaways
For Small Imports (< 1,000 rows):
- Use basic ToModel with WithHeadingRow
- Simple try-catch error handling
For Large Imports
- Implement ShouldQueue for background processing
- Use batch size 100-200 with chunk size 200-500
- Consider implementing progress tracking
- Monitor queue worker performance
- Implement retry logic for failed jobs
Common Pitfalls to Avoid
- Forgetting WithHeadingRow: Without it, you access columns by index (0, 1, 2) instead of column names
- Ignoring memory limits: Large files exceed default PHP memory allocation
- No error handling: Users won’t know if their import failed
- Using synchronous imports for large files: Causes request timeouts
- Not setting file size limits: Prevents denial-of-service attacks
- Storing files in public directory: Exposes sensitive data
How To Check When Excel Import Failed
Method 1: Database Failed Jobs Table
Laravel automatically logs failed jobs to the failed_jobs table.
Check Failed Jobs:
php artisan queue:failed

Method 2: Real-time Logging to File
In your Import Class:
public function registerEvents(): array
{
    return [
        ImportFailed::class => function (ImportFailed $event) {
            Log::channel('imports')->error('Import Failed', [
                'file'      => $this->fileName,
                'user'      => $this->importedBy->email,
                'exception' => $event->getException()->getMessage(),
                'timestamp' => now(),
            ]);
        },
    ];
}
Check Log File:
storage/logs/imports.log
Conclusion
Maatwebsite Excel provides a comprehensive, production-ready solution for Excel imports in Laravel 12. By combining batch inserts, chunk reading and queue processing, you can handle even the largest datasets efficiently and securely. Start with the basic implementation and gradually add optimization features as your import requirements grow.
The techniques in this guide enable you to build robust data import functionality that scales with your application’s needs while maintaining data integrity and user experience. Whether you’re handling small CSV files or massive enterprise datasets, Maatwebsite gives you the tools to succeed.
Happy coding and successful imports!
