
In this Laravel tutorial, you will learn how to implement laravel 12 custom validation rule with parameters, explained step by step with practical examples. We’ll use different methods to implement custom validation with parameters in Laravel, including using Rule objects and using Closures.
Table of Contents
Why Use Custom Validation Rules?
Custom validation rules are useful when:
- You need complex business logic validation.
- Your validation depends on multiple fields.
- You need domain-specific rules that Laravel doesn’t provide by default.
- Custom validation rules with parameters eliminate code duplication by creating single, reusable validation classes that adapt to different contexts through constructor parameters
Creating Custom Validation Rules With Additional Parameters
Laravel provides two ways to create custom validation: using a Closure and a Validation Rule object. In this guide, we will use both methods to create parameterized validation rules.
Method 1: Using Rule Objects (Recommended)
Using a Rule object is the recommended approach when you want to reuse validation logic across multiple forms or controllers.
Step 1: Generate a Custom Rule
You can create a Rule object validation class using the following Artisan command:
php artisan make:rule Username
This command generates a new file Username.php inside App\Rules folder.
Update app/Rules/Username.php file
Now, open Username.php file and update with the following code:
<?php

namespace App\Rules;

use Closure;
use Illuminate\Contracts\Validation\ValidationRule;

class Username implements ValidationRule
{


    protected $minLength;
    protected $allowSpecialChars;

    public function __construct(int $minLength = 3, bool $allowSpecialChars = false)
    {
        $this->minLength = $minLength;
        $this->allowSpecialChars = $allowSpecialChars;

    }
    /**
     * Run the validation rule.
     *
     * @param  \Closure(string, ?string=): \Illuminate\Translation\PotentiallyTranslatedString  $fail
     */
    public function validate(string $attribute, mixed $value, Closure $fail): void
    {
        // Check minimum length
        if (strlen($value) < $this->minLength) {
            $fail("The {$attribute} must be at least {$this->minLength} characters long.");
            return;
        }

        // Check for valid characters
        if ($this->allowSpecialChars) {
            $pattern = '/^[a-zA-Z_@\-\.]+$/';
        } else {
            $pattern = '/^[a-zA-Z_]+$/';
        }

        if (!preg_match($pattern, $value)) {
            $fail("The {$attribute} contains invalid characters.");
            return;
        }
    }

}
In Laravel 12, implement validate(string $attribute, mixed $value, Closure $fail) via ValidationRule, and accept constructor parameters for flexible policies. In the above validation rule, we use two parameters — minLength and allowSpecialChars — in the constructor for username validation. By default, minLength is set to 3 and allowSpecialChars is false, so passing values is optional. You can provide custom values when needed. The rule first checks if the username does not meets the minimum length requirement , a validation error message is returned. Next, it validates the characters in the username: if allowSpecialChars is true, special characters like @, -, or . are allowed; otherwise, only letters and underscores are permitted.
Read Also : Laravel 12 Custom Validation Rules Example
Step 2: Use Validation Rule in Controller
In this step, we’ll learn how to use our custom validation rule inside a controller to validate the username field. Custom rules work just like Laravel’s built-in validation rules, but you need to use the new keyword with the rule class name. If your custom rule accepts parameters, you must pass them when applying the rule. For example: ‘username’ => [‘required’, ‘string’, new Username(5, true)].
In this example, we set the minimum username length to 5 and allowed special characters by passing true as the second parameter.
<?php

namespace App\Http\Controllers;

use Illuminate\Http\Request;
use Illuminate\View\View;
use Illuminate\Http\RedirectResponse;
use App\Rules\Username;

class UserController extends Controller
{
     /**
     * Show the application dashboard.
     *
     * @return \Illuminate\Http\Response
     */
    public function create(): View
    {
        return view('form');
    }

     /**
     * Show the application dashboard.
     *
     * @return \Illuminate\Http\Response
     */
    public function store(Request $request): RedirectResponse
    {
        $validatedData = $request->validate([
                'username'=>['required', 'string', new Username(5,true)],

            ]);

        return back()->with('success', 'User created successfully.');
    }
}
Step 3: Add Routes
In this step, we’ll define routes to test our custom validation. The first route will display the frontend form, and the second route will handle the form submission and run the validation.
<?php

use Illuminate\Support\Facades\Route;
use App\Http\Controllers\UserController;

Route::get('custom-validation', [UserController::class, 'create']);
Route::post('custom-validation', [UserController::class, 'store'])->name('validate');
Step 4: Create Blade to Test Validation
In this step, we’ll set up a Blade template at resources/views/form.blade.php with a username input field, using Bootstrap 5.3 for styling.
<!DOCTYPE html>
<html lang="en">
<head>
    <title>Laravel 12 Custom Validation Rule With Parameters Example - ItStuffSolutiotions</title>
    <meta charset="utf-8">
    <meta http-equiv="X-UA-Compatible" content="IE=edge">
    <meta name="viewport" content="width=device-width, initial-scale=1">

    <!-- Bootstrap 5.3.8 CSS -->
    <link href="https://cdn.jsdelivr.net/npm/bootstrap@5.3.8/dist/css/bootstrap.min.css" rel="stylesheet">
</head>
<body>
<div class="container">
    <div class="card mt-5 shadow-lg border-0">
        <h3 class="card-header p-3 bg-primary text-white">
            Laravel 12 Custom Validation Rule With Parameters Example - ItStuffSolutiotions
        </h3>
        <div class="card-body">
            @session('success')
            <div class="alert alert-success alert-dismissible fade show" role="alert">
                    {{ session('success') }}
                    <button type="button" class="btn-close" data-bs-dismiss="alert" aria-label="Close"></button>
                </div>
            @endsession
            <form method="POST" action="{{ route('validate') }}">
                @csrf

                <div class="mb-3">
                    <label class="form-label" for="username">Name:</label>
                    <input
                        type="text"
                        name="username"
                        id="username"
                        class="form-control @error('username') is-invalid @enderror"
                        placeholder="Enter your name">

                    @error('username')
                        <div class="invalid-feedback">{{ $message }}</div>
                    @enderror
                </div>

                <div class="mb-3">
                    <button class="btn btn-success btn-submit">Submit</button>
                </div>
            </form>
        </div>
    </div>
</div>

<!-- Bootstrap 5.3.8 JS (with Popper) -->
<script src="https://cdn.jsdelivr.net/npm/bootstrap@5.3.8/dist/js/bootstrap.bundle.min.js"></script>
</body>
</html>
Read Also : Laravel 12 Multiple Image Upload CRUD with Preview Example
Step 5: Testing the Custom Validation
Now it’s time to test the rule we created. Start the Laravel development server by running the command below in your terminal:
php artisan serve
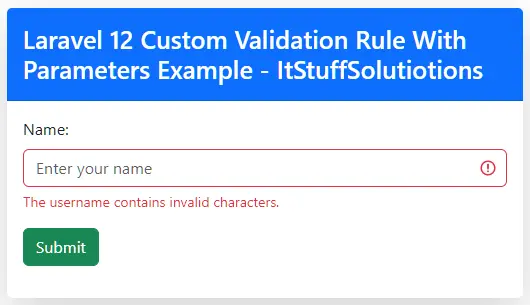
Once the server is running, open http://127.0.0.1:8000/custom-validation in your browser. If you enter a username shorter than 5 characters or include disallowed special characters, you’ll see the validation error message appear as shown in the example below.
When to Use Rule Object Validation with Parameters
Reusability
- If the validation logic is needed in multiple controllers or forms.
- Example: Checking username rules, domain restrictions, or number ranges across different models.
Parameterized Rules
- When the same logic changes based on values (like min/max limits).
Clean Code & Maintainability
- Keeps controllers light by moving validation logic into a separate class.
- Easy to update or extend rules later without touching multiple places.
Complex or Multi-Step Validation
- If validation involves multiple checks (length, patterns, dependencies).
- Example: checking input against multiple parameters or another database field.
Custom Error Messages
- When you need dynamic error messages based on parameters.
Method 2: Using Closures
For quick, one-time validations, you can use a closure. You can pass parameters from the surrounding code, and the closure works with the same attribute, value, and fail inputs as a normal rule. You can apply validation directly in your controller using $request->validate(). Example given below:
Step 1: Define a Closure with Parameters
<?php

namespace App\Http\Controllers;

use Illuminate\Http\Request;
use Illuminate\View\View;
use Illuminate\Http\RedirectResponse;
use App\Rules\Username;

class UserController extends Controller
{
     /**
     * Show the application dashboard.
     *
     * @return \Illuminate\Http\Response
     */
    public function create(): View
    {
        return view('form');
    }

     /**
     * Show the application dashboard.
     *
     * @return \Illuminate\Http\Response
     */
    public function store(Request $request): RedirectResponse
    {
        $minWords = 3;
        $maxWords = 8;

        $validatedData = $request->validate([
                'username'=>['required', 'string', new Username(5,true)],
                'description' => [
                    'required',
                    function (string $attribute, mixed $value, \Closure $fail) use ($minWords, $maxWords) {
                        $count = str_word_count(trim((string) $value));
                        if ($count < $minWords || $count > $maxWords) {
                            $fail("The {$attribute} must be between {$minWords} and {$maxWords} words.");
                        }
                    },
                ],
            ]);


        return back()->with('success', 'User created successfully.');
    }
}
The UserController has two methods: create() shows the form view. store() handles form submission and validates inputs.
Signature
- $attribute: The field name (description).
- $value: The submitted value.
- $fail: Callback used to throw a validation error.
use ($minWords, $maxWords)
- Captures variables from the local scope so they can be used inside the Closure.
- In this case, it pulls $minWords = 3 and $maxWords = 8.
Logic
- Converts the input to a string and trims spaces.
- Uses str_word_count to count words.
- If the count is outside the 3–8 word range, it fails with a custom error message.
You can also simplify your closure validation by replacing the original function with this simpler version:
function ($attribute, $value, $fail) use ($minWords, $maxWords) {
    $count = str_word_count(trim((string) $value));
    if ($count < $minWords || $count > $maxWords) {
        $fail("The {$attribute} must be between {$minWords} and {$maxWords} words.");
    }
},
Step 2: Prepare Your Form Request
In this step, we have a form.blade.php where we added a description field to test our closure-based validation.
<!DOCTYPE html>
<html lang="en">
<head>
    <title>Laravel 12 Custom Validation Rule With Parameters Example - ItStuffSolutiotions</title>
    <meta charset="utf-8">
    <meta http-equiv="X-UA-Compatible" content="IE=edge">
    <meta name="viewport" content="width=device-width, initial-scale=1">

    <!-- Bootstrap 5.3.8 CSS -->
    <link href="https://cdn.jsdelivr.net/npm/bootstrap@5.3.8/dist/css/bootstrap.min.css" rel="stylesheet">
</head>
<body>
<div class="container">
    <div class="card mt-5 shadow-lg border-0">
        <h3 class="card-header p-3 bg-primary text-white">
            Laravel 12 Custom Validation Rule With Parameters Example - ItStuffSolutiotions
        </h3>
        <div class="card-body">
            @session('success')
            <div class="alert alert-success alert-dismissible fade show" role="alert">
                    {{ session('success') }}
                    <button type="button" class="btn-close" data-bs-dismiss="alert" aria-label="Close"></button>
                </div>
            @endsession
            <form method="POST" action="{{ route('validate') }}">
                @csrf

                <div class="mb-3">
                    <label class="form-label" for="username">Name:</label>
                    <input
                        type="text"
                        name="username"
                        id="username"
                        class="form-control @error('username') is-invalid @enderror"
                        placeholder="Enter your name">

                    @error('username')
                        <div class="invalid-feedback">{{ $message }}</div>
                    @enderror
                </div>
                <div class="mb-3">
                    <label class="form-label" for="description">Description:</label>
                    <textarea
                        type="text"
                        name="description"
                        id="description"
                        class="form-control @error('description') is-invalid @enderror"
                        placeholder="Enter your description"></textarea>

                    @error('description')
                        <div class="invalid-feedback">{{ $message }}</div>
                    @enderror
                </div>

                <div class="mb-3">
                    <button class="btn btn-success btn-submit">Submit</button>
                </div>
            </form>
        </div>
    </div>
</div>

<!-- Bootstrap 5.3.8 JS (with Popper) -->
<script src="https://cdn.jsdelivr.net/npm/bootstrap@5.3.8/dist/js/bootstrap.bundle.min.js"></script>
</body>
</html>
Step 3: Test Your Validation
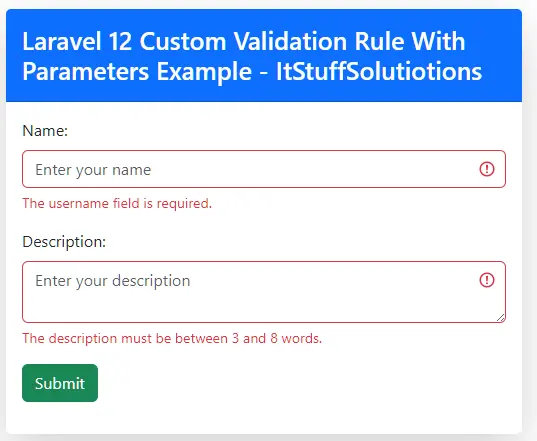
Start the Laravel development server and open http://127.0.0.1:8000/custom-validation in your browser. Test the description field validation by entering fewer than 3 words or more than 8 words. The closure-based validation will display an error if the input does not meet the word count rules.
Why Use Closure Validation?
- Quick and Simple: Great for one-off validations that don’t need to be reused.
- Inline Parameters : You can easily capture values like $minWords and $maxWords.
- No Extra Class Needed : Unlike Rule Objects, you don’t need to generate a separate class.
When to Prefer Rule Objects Instead
If this word-count validation will be used in multiple forms, better to create a reusable Rule Object (e.g., WordCountRule) so you don’t repeat code.
Conclusion
In this tutorial, we explored Laravel 12 custom validation rules with parameters step by step using both Rule objects and Closures.
- Rule Objects are best suited for reusable, complex, and parameterized validation logic. They allow clean code organization, easy maintenance, and flexible parameter handling.
- Closures are ideal for quick, one-off validations where logic is specific to a single controller or form and doesn’t need to be reused.
By combining these two approaches, Laravel gives you the flexibility to handle everything from simple inline checks to advanced business rules with dynamic parameters.
With custom rules, you can:
- Enforce domain-specific validation.
- Reuse logic across multiple forms.
- Pass parameters for flexible policies.
- Provide dynamic error messages.
Mastering parameterized custom rules not only makes your validation more powerful but also keeps your codebase clean, scalable, and easy to maintain.
