
In this tutorial, we’ll show you how to install and use SweetAlert2 in Laravel 12 with Vite and CDN. SweetAlert2 is a beautiful, responsive JavaScript library for displaying alerts, confirmation dialogs, and notifications. Integrating SweetAlert2 into a Laravel 12 project using Vite makes it easy to enhance your app’s user experience without relying on default browser alerts.
Laravel 12 How to Install SweetAlert2 With Vite
Table of Contents
Install Laravel project
First, create a new Laravel project. If you already have one, you can skip this step.
composer create-project laravel/laravel sweetalert-demo
Method 1: Install SweetAlert2 Using NPM
This method integrates SweetAlert2 into your build process, offering better performance and maintainability for production applications.
Step 1: Install SweetAlert2 via NPM
Use npm to install jquery and SweetAlert2 in your Laravel project:
npm install jquery
npm install sweetalert2
This will add both packages to your node_modules directory and update your package.json.
Step 2: Import SweetAlert2 in app.js
Open your resources/js/app.js file and import jQuery and SweetAlert2:
import './bootstrap';

import jQuery from 'jquery';
window.$ = jQuery;

import swal from 'sweetalert2';
window.Swal = swal;
Now jQuery and SweetAlert2 is available to use anywhere in your JavaScript code.
Step 3: Install Bootstrap and dependencies(optional)
This step is optional — you can skip it if you don’t need Bootstrap styling.
In this step, we’ll install Bootstrap via npm in your Laravel 12 project. By default, your resources/js/app.js file contains the following line:
import './bootstrap';
That line loads resources/js/bootstrap.js, which only imports Bootstrap’s JavaScript (JS) features like modals, dropdowns, tooltips not the CSS styles.
So even though the JS works, the Bootstrap CSS is never loaded, meaning your .btn, .card, .container, etc. styles won’t show up.
To include both Bootstrap’s JS and CSS, run the command below:
npm install bootstrap @popperjs/core
After installation, open your resources/js/app.js file and update it as follows:
import './bootstrap';
import 'bootstrap/dist/css/bootstrap.min.css';

import jQuery from 'jquery';
window.$ = jQuery;

import swal from 'sweetalert2';
window.Swal = swal;
This setup ensures that:
- Bootstrap’s CSS and JS are both loaded,
- jQuery is available globally,
- SweetAlert2 (Swal) is also available for your alert dialogs.
Step 4: Compile Assets with Vite
After editing app.js , compile your assets:
npm run dev
This command compiles and optimizes your assets using Vite.
Step 4: Define Routes
Open routes/web.php and add a test route:
<?php

use Illuminate\Support\Facades\Route;

Route::get('/sweetalert-demo', function () {
    return view('sweetalert');
});
Read Also : Laravel 12 SweetAlert2 Delete Confirmation Example
Step 5: Set Up SweetAlert2 in Blade
Create resources/views/sweetalert.blade.php . Make sure your Blade template includes:
@vite([‘resources/css/app.css’, ‘resources/js/app.js’])
This ensures Bootstrap CSS and SweetAlert2 work correctly.
⚠️ Important:
Make sure you are using the <script type=”module”> tag when including your compiled JavaScript file.
Do not use a regular <script> tag — otherwise, you may encounter the following error in your browser console:
Uncaught ReferenceError: $ is not defined
<!DOCTYPE html>
<html lang="en">
<head>
<title>Laravel 12 How to Install SweetAlert2 With Vite - ItStuffSolutiotions</title>
<meta charset="utf-8">
<meta http-equiv="X-UA-Compatible" content="IE=edge">
<meta name="viewport" content="width=device-width, initial-scale=1">
<meta name="csrf-token" content="{{ csrf_token() }}">
<!-- Bootstrap 5.3.8 CSS -->
@vite(['resources/css/app.css', 'resources/js/app.js'])
</head>
<body>
<div class="container">
<div class="card mt-5 shadow-lg border-0">
<h3 class="card-header p-3 bg-primary text-white">
Laravel 12 How to Install SweetAlert2 With Vite - ItStuffSolutiotions
</h3>
<div class="container mt-5">
<h1 class="mb-4">Laravel 12 How to Install SweetAlert2 With Vite</h1>
<div class="row">
<div class="col-md-4 mb-3">
<button class="btn btn-success w-50" id="success-btn">Success Alert</button>
</div>
<div class="col-md-4 mb-3">
<button class="btn btn-danger w-50" id="error-btn">Error Alert</button>
</div>
<div class="col-md-4 mb-3">
<button class="btn btn-warning w-50" id="confirm-btn">Confirm Dialog</button>
</div>
</div>
</div>
</div>
</div>
<script type="module">
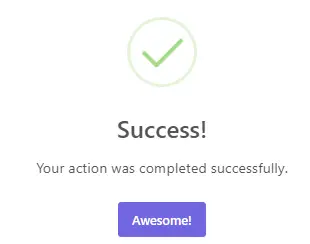
// Success Alert
$('#success-btn').on('click', function() {
Swal.fire({
title: 'Success!',
text: 'Your action was completed successfully.',
icon: 'success',
confirmButtonText: 'Awesome!'
});
});
// Error Alert
$('#error-btn').on('click', function() {
Swal.fire({
title: 'Error!',
text: 'Something went wrong. Please try again.',
icon: 'error',
confirmButtonText: 'OK'
});
});
// Confirm Dialog
$('#confirm-btn').on('click', function() {
Swal.fire({
title: 'Are you sure?',
text: "This action cannot be undone!",
icon: 'warning',
showCancelButton: true,
confirmButtonColor: '#3085d6',
cancelButtonColor: '#d33',
confirmButtonText: 'Yes, delete it!',
cancelButtonText: 'Cancel'
}).then((result) => {
if (result.isConfirmed) {
Swal.fire(
'Deleted!',
'File has been deleted Successfully.',
'success'
);
}
});
});
</script>
</body>
</html>

Step 6: Test Your Application
Make sure Vite is running:
npm run dev
In a separate terminal, start Laravel:
php artisan serve
Visit http://127.0.0.1:8000/sweetalert-demo in your browser and test the alerts.

Read Also : Laravel 12 Toastr JS Notifications Example
Method 2: Install SweetAlert2 Using CDN (Quickest Setup)
The CDN method requires no build tools and is perfect for quick prototyping or simple projects.
Step 1: Update a Blade View
The only difference in this Blade file is that we’re using CDN links instead of Vite — the UI remains exactly the same.
<!DOCTYPE html>
<html lang="en">
<head>
    <title>Laravel 12 How to Install SweetAlert2 With Vite - ItStuffSolutiotions</title>
    <meta charset="utf-8">
    <meta http-equiv="X-UA-Compatible" content="IE=edge">
    <meta name="viewport" content="width=device-width, initial-scale=1">
   <meta name="csrf-token" content="{{ csrf_token() }}">
    <!-- Bootstrap 5.3.8 CSS -->
   <link href="https://cdn.jsdelivr.net/npm/bootstrap@5.3.8/dist/css/bootstrap.min.css" rel="stylesheet">
   <link href="https://cdn.jsdelivr.net/npm/sweetalert2@11.26.2/dist/sweetalert2.min.css" rel="stylesheet">

</head>
<body>
<div class="container">
    <div class="card mt-5 shadow-lg border-0">
        <h3 class="card-header p-3 bg-primary text-white">
            Laravel 12 How to Install SweetAlert2 With Vite - ItStuffSolutiotions
        </h3>
      <div class="container mt-5">
        <h1 class="mb-4">Laravel 12 How to Install SweetAlert2 With Vite</h1>

        <div class="row">
            <div class="col-md-4 mb-3">
                <button class="btn btn-success w-50" id="success-btn">Success Alert</button>
            </div>
            <div class="col-md-4 mb-3">
                <button class="btn btn-danger w-50" id="error-btn">Error Alert</button>
            </div>
            <div class="col-md-4 mb-3">
                <button class="btn btn-warning w-50" id="confirm-btn">Confirm Dialog</button>
            </div>
        </div>
    </div>
    </div>
</div>

<script src="https://code.jquery.com/jquery-3.6.0.min.js"></script>
<script src="https://cdn.jsdelivr.net/npm/bootstrap@5.3.8/dist/js/bootstrap.bundle.min.js"></script>
<script src="https://cdn.jsdelivr.net/npm/sweetalert2@11.26.2/dist/sweetalert2.all.min.js"></script>
 <script>

    // Success Alert
        $('#success-btn').on('click', function() {
            Swal.fire({
                title: 'Success!',
                text: 'Your action was completed successfully.',
                icon: 'success',
                confirmButtonText: 'Awesome!'
            });
        });

        // Error Alert
        $('#error-btn').on('click', function() {
            Swal.fire({
                title: 'Error!',
                text: 'Something went wrong. Please try again.',
                icon: 'error',
                confirmButtonText: 'OK'
            });
        });

        // Confirm Dialog
        $('#confirm-btn').on('click', function() {
            Swal.fire({
                title: 'Are you sure?',
                text: "This action cannot be undone!",
                icon: 'warning',
                showCancelButton: true,
                confirmButtonColor: '#3085d6',
                cancelButtonColor: '#d33',
                confirmButtonText: 'Yes, delete it!',
                cancelButtonText: 'Cancel'
            }).then((result) => {
                if (result.isConfirmed) {
                    Swal.fire(
                        'Deleted!',
                        'File has been deleted Successfully.',
                        'success'
                    );
                }
            });
        });
    </script>
</body>
</html>
Step 2: Run the Application
Run the laravel command to start laravel development server
php artisan serve
Visit http://127.0.0.1:8000/sweetalert-demo to test the alerts.
Troubleshooting Common Issues
Issue 1: Swal is not defined
Make sure you’ve run npm run dev or npm run build after installing SweetAlert2.
Issue 2: Vite build fails
Clear cache and reinstall dependencies:
rm -rf node_modules package-lock.json
npm install
npm run build
Issue 3: Assets not loading in production
Always run npm run build before deploying:
npm run build
php artisan optimize
Conclusion
Installing SweetAlert2 in Laravel 12 with Vite is straightforward and offers significant benefits over traditional JavaScript alerts. The CDN method provides quick setup for prototyping, while the NPM method with Vite offers better performance and maintainability for production applications.
Laravel 12’s zero-breaking-changes philosophy makes upgrading seamless, and Vite’s fast build times enhance developer experience. SweetAlert2’s beautiful, customizable alerts improve user experience and make your Laravel application feel more polished and professional.
Choose the installation method that best fits your project requirements, follow the troubleshooting tips if you encounter issues, and enjoy building beautiful alert systems in your Laravel 12 applications.
