
In this post Laravel 12 Image Validation Rules Example Tutorial, I will guide you through the process of uploading an image validation rules in laravel 12 application. laravel provides default image validation rules like image, mimes, max, min,size and dimensions.
Using Laravel default validation rules you can validate file type “jpeg,jpg,png,svg,etc”, using max and min rule to set the limit of upload file size. using laravel dimensions validation rule you can validate file max height,max width and min height,min width limit. Simply follow the steps below:Simply follow the steps below to implement file upload functionality in your Laravel 12 application.
Table of Contents
Step for Laravel 12 Image Validation Rules:
- Step 1: Install Laravel 12
- Step 2: Create Controller
- Step 3: Create Routes
- Step 4: Create Blade File
- Step 5: Run Laravel App
🛠️ Step 1: Install Laravel 12
This step is only when you have not installed Laravel 12 , you can create a new project by running the following command:
laravel new laravel-image-upload
Minimum PHP version for Laravel installation
- PHP >= 8.2
🧾 Step 2:Create the Controller
In step 2, we will create a new controller ImageController; in ImageController, we will add two method index() and postImage() for blade view and to store image upload and validation logic.
create ImageController by typing the following command:
php artisan make:controller ImageController

In this step we will write two methods in ImageController index() and postImage(), controller we will write two methods ‘index()’ and postImage
(). index() method will render the view and postImage() method will do the image validation and the process of uploading and saving the image file to public folder.
next step, let’s update the following code to ImageController File.open the File app/Http/Controllers/ImageController.php
<?php
namespace App\Http\Controllers;
use Illuminate\Http\Request;
use Str;
class ImageController extends Controller
{
public function index()
{
return view('image');
}
public function postImage(Request $request){
$request->validate([
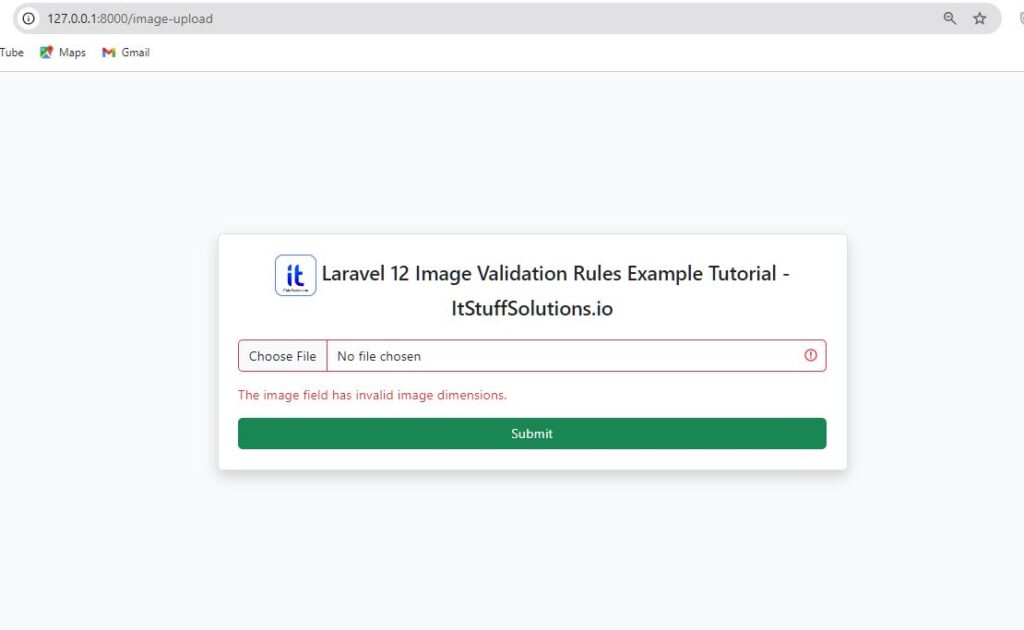
'image' => 'required|image|mimes:jpeg,png,jpg,gif,svg|max:2048 | min:50 |dimensions:min_width=100,max_width=500,min_height:200,max_height:1000',
]);
$imageName = time(). '_' . Str::random(10).'.'.$request->image->extension();
//store file in public folder
$request->image->move(public_path('uploads'), $imageName);
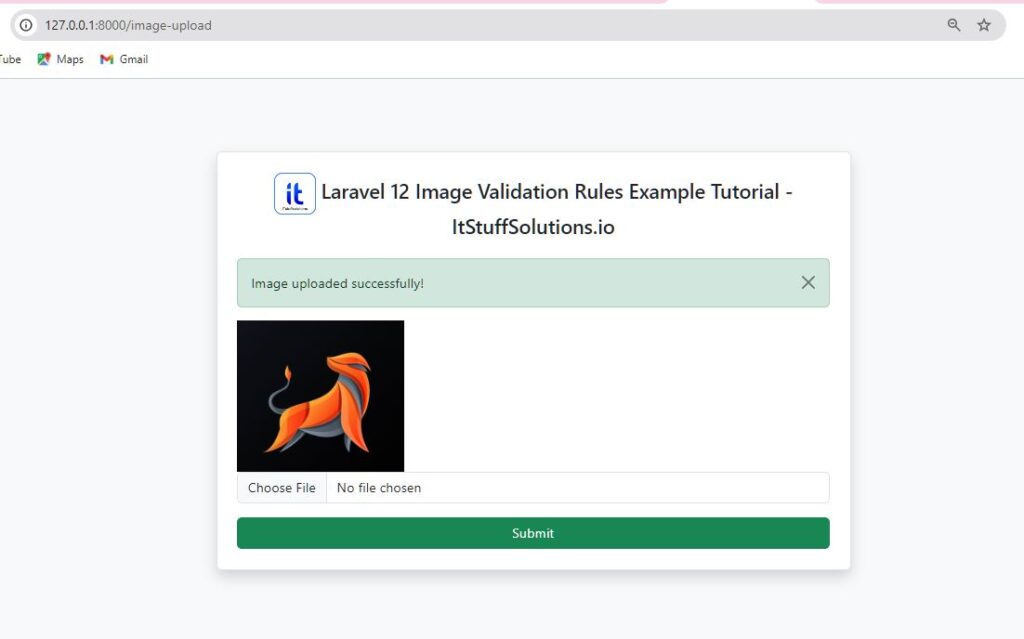
return back()->with('success', 'Image uploaded successfully!')->with('img',$imageName);
}
}
📷 Image Validation Rules Guidelines
- required: The image field cannot be empty — uploading an image is mandatory.
- image: This validation rule Confirms that the uploaded file is a valid image format.
- mimes: Only allows specific types like .jpeg, .png, etc., to ensure compatibility.
- max:2048: Restricts the image size to a maximum of 2MB (2048 kilobytes).
- dimensions: The image must have a width between 100px to 500px and height between 200px to 2000px to be accepted.
The above code works fine for all image types except SVG. When you include the svg mime type, Laravel will throw the error:

This happens because, by default, the image rule does not allow SVG files due to potential XSS vulnerabilities.
If you need to allow SVG files, you can use the allow_svg directive with the image rule, as shown in the example below:
          $request->validate([
            'image' => 'required|image:allow_svg|mimes:jpeg,png,jpg,gif,svg|max:2048 |dimensions:min_width=100,max_width=500,min_height:200,max_height:1000',
        ]);
Another approach is to use Validator::make instead of $request->validate. The Validator::make method allows SVG file validation in Laravel 12. Based on my experiments, there is no official information available about support in other Laravel versions. The example code is given below:
$validator = Validator::make(['image' => 'required|image' ], ['image.image' => 'Please upload a valid image file']);
        if ($validator->fails()) {
              return redirect()->back()
                         ->withErrors($validator)
                         ->withInput();
        }
Read Also : Laravel 12 image Upload in public folder with preview
🧑 Step 3:Set Up Routes
Furthermore, open the file routes/web.php and add the routes to manage GET and POST requests for rendering view and image upload logic.
<?php

use Illuminate\Support\Facades\Route;
use App\Http\Controllers\ImageController;

Route::get('/', function () {
    return view('welcome');
});
Route::get('/image-upload', [ImageController::class ,'index']);
Route::post('/image-upload', [ImageController::class ,'postImage'])->name('post.image');
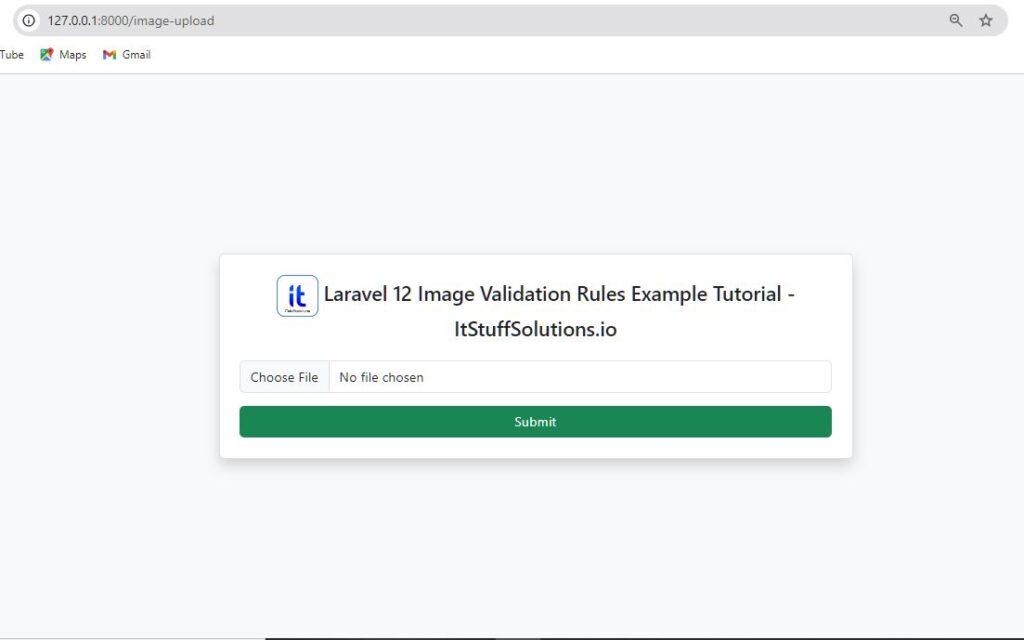
📝 Step 4:Create the Blade View
In the final step, create a new blade file “image.blade.php“.
resources/views/image.blade.php
<!doctype html>
<html lang="en">

<head>
    <meta charset="utf-8">
    <meta name="viewport" content="width=device-width, initial-scale=1">
    <title>Laravel 12 Image Validation Rules Example Tutorial - ItStuffSolutions.io</title>
    <link href="https://cdn.jsdelivr.net/npm/bootstrap@5.3.6/dist/css/bootstrap.min.css" rel="stylesheet">
</head>

<body>
    <div class="d-flex justify-content-center align-items-center vh-100 bg-light">
        <div class="col-12 col-md-6 col-lg-6">
            <div class="border p-4 rounded bg-white shadow">
                <h4 class="mb-4 text-center"><img src="{{asset('itstuffsolutions.png')}}" width="50"/>   Laravel 12 Image Validation Rules Example Tutorial - ItStuffSolutions.io</h4>
                @session('success')
                <div class="alert alert-success alert-dismissible fade show" role="alert">
                  {{ $value }}
                <button type="button" class="btn-close" data-bs-dismiss="alert" aria-label="Close"></button>
               </div>
               <img src="{{asset('/uploads/'.session('img'))}}" class="img-fluid" width = "200"/>
                @endsession
                <form action="{{ route('post.image') }}" method="POST" enctype="multipart/form-data">
                    @csrf
                    <div class="mb-3">
                        <div class="input-group">
                            <input type="file" class="form-control @error('image') is-invalid @enderror"
                                id="inputGroupFile04" aria-describedby="inputGroupFileAddon04" aria-label="Upload"
                                accept="image/*" name="image"
                                onchange="document.getElementById('preview').src = window.URL.createObjectURL(this.files[0]);document.getElementById('preview').style.display = 'block';">
                        </div>
                    </div>
                    <div class="mb-3">
                       @error('image')
                          <div class="text-danger">{{ $message }}</div>
                      @enderror
                    </div>
                    <div class="mb-3">
                        <img id="preview" src="" alt="Image preview"
                            style="max-width: 300px; display: block; border: 1px solid #ccc; padding: 5px;display:none;">
                    </div>


                    <div class="d-grid">
                        <button type="submit" class="btn btn-success">Submit</button>
                    </div>
                </form>
            </div>
        </div>
    </div>
  <script src="https://cdn.jsdelivr.net/npm/bootstrap@5.3.6/dist/js/bootstrap.bundle.min.js" ></script>
</body>

</html>
🚀Step 5: Run the Application
After completing all the steps , it’s time to launch the Laravel image upload project using the command below:
php artisan serve

Simply open any browser on your system, type in the URL below, and the application’s result will be displayed:
Conclusion
In this post Laravel 12 Image Validation Rules Example Tutorial, we learned how to work with different image validation rules in a Laravel 12 application. Laravel provides several built-in rules like image, mimes, max, min, size, and dimensions to handle image uploads securely and efficiently.
Using Laravel’s default validation rules, you can easily restrict file type, size, and dimensions, ensuring only valid images are stored in your application. This not only improves the user experience but also helps maintain the security and reliability of your project.
Frequently Asked Questions(FAQs)
Q1: What’s the difference between image, mimes, and extensions rules?
image: Validates that the file is an image by MIME type (jpg, jpeg, png, bmp, gif, webp by default).
mimes: Restricts to specific extensions (validated against MIME internally).
extensions: Checks only the user-assigned extension. Don’t rely on this rule alone; combine with mimes or mimetypes.
Q2: Do I need enctype on my form for file uploads?
Yes. Always add enctype=”multipart/form-data” to the form. Without it, the file won’t be uploaded and validation will fail even for valid images.
Q3: How do I limit image file size?
Use max: XXXX where XXXX is in kilobytes:
max:1024 → max 1 MB
max:2048 → max 2 MB
Note: size:1024 means exactly 1 MB, not “up to.” Typically use max instead of size.
Q4: Can I allow SVG uploads?
The image rule blocks SVG by default due to XSS risk. To allow:
image:allow_svg
Consider sanitizing SVGs or avoiding them unless necessary.
Q5: Can I customize error messages?
Yes. In a Form Request’s messages() you can customize message in two ways :
1. Using $request->validate()
$request->validate([
            'image' => 'required|image',
        ],['image.image' => 'Please upload a valid image file']);
2. Using Validator::make()
$validator = Validator::make(['image' => 'required|image' ], ['image.image' => 'Please upload a valid image file']);
        if ($validator->fails()) {
              return redirect()->back()
                         ->withErrors($validator)
                         ->withInput();
        }
Q6: Any security tips for image uploads?
- Validate MIME type using image and mimes.
- Avoid SVG unless absolutely needed; sanitize if enabled.
- Store files outside webroot and serve via signed URLs where appropriate. If storing in public, generate safe filenames and avoid executing uploaded content.
Q7: What are good example rules for common use-cases?
- Profile avatar (≤ 1 MB, min 200×200):
- Banner (≤ 4 MB, 3:1 ratio):
- General upload (≤ 2 MB, common formats):
- required|image|mimes:jpg,jpeg,png,webp|max:2048
