
In this Laravel 12 tutorial, you will learn how to implement laravel 12 ajax autocomplete search using Typeahead JS. Typeahead JS is a powerful and lightweight JavaScript library that provides fast and user-friendly autocomplete functionality, making your Laravel application’s search feature more dynamic and interactive.
We’ll go step-by-step from setting up the Laravel project to integrating Typeahead for real-time search suggestions from the database.
Table of Contents
What is Typeahead JS?
Typeahead JS is a fast, fully-featured autocomplete library originally developed by Twitter. It provides an elegant solution for building typeahead functionality with features like intelligent caching, fast lookups, and support for remote data sources. Combined with Bloodhound (its suggestion engine), Typeahead JS offers advanced functionalities such as prefetching, rate-limiting network requests, and backfilling with remote data.
Why Use Typeahead JS with Laravel?
Integrating Typeahead JS with Laravel provides several advantages:
- Enhanced User Experience: Users receive instant feedback and suggestions as they type
- Reduced Server Load: Smart caching minimizes unnecessary database queries
- Flexible Implementation: Works seamlessly with Laravel’s routing and controller architecture
- Lightweight Solution: No heavy frontend frameworks required
- Ajax-Powered: Asynchronous data fetching without page reloads
- Bootstrap Compatible: Integrates perfectly with Bootstrap styling
Prerequisites
Before starting this tutorial, ensure you have:
- PHP 8.2 or higher installed
- Composer (PHP package manager)
- Node.js and npm
- A code editor (VS Code, PHPStorm, etc.)
- Basic knowledge of Laravel and JavaScript
- MySQL or another database system
Step 1: Install Laravel 12
If you haven’t already created a Laravel 12 application, open your terminal and run the following comma.
composer create-project laravel/laravel laravel-auotocomplete-typeahead-example
Navigate to your project directory:
cd laravel-auotocomplete-typeahead-example
Step 2: Configure Database Connection
Open the .env file in your project root and configure your database credentials:
DB_CONNECTION=mysql
DB_HOST=127.0.0.1
DB_PORT=3306
DB_DATABASE=laravel
DB_USERNAME=root
DB_PASSWORD=your_password
Step 3: Run Default Migrations
Laravel comes with default migrations including the users table. Run the migrations to create the necessary database tables:
php artisan migrate
This command will create the users table along with other default tables like password_resets etc.
Read Also : Laravel 12 Select2 Ajax Autocomplete Search Example
Step 4: Generate Dummy Data Using Factory
Laravel provides a powerful factory system for generating dummy data. We’ll use the default User factory to create test users. The User factory is located at database/factories/UserFactory.php and uses the Faker library to generate realistic dummy data.
Open your terminal and start Laravel Tinker:
php artisan tinker
Execute the following command to create 60 dummy users:
User::factory()->count(60)->create()
Step 5: Define Routes
Open routes/web.php and add the following routes:
<?php

use Illuminate\Support\Facades\Route;

use App\Http\Controllers\UserController;

Route::get('user-search', [UserController::class, 'index']);
Route::get('search-autocomplete', [UserController::class, 'search'])->name('search');
We use the user-search route to load the view and search-autocomplete to handle the search query and return results.
Read Also : Laravel 12 SweetAlert2 Delete Confirmation Example
Step 6: Create UserController
Now we’ll create a controller to handle the autocomplete search logic. Run the following Artisan command:
php artisan make:controller UserController
This creates a new controller at app/Http/Controllers/UserController.php. Open the file and add the following code:
<?php

namespace App\Http\Controllers;

use Illuminate\Http\Request;
use App\Models\User;

class UserController extends Controller
{
    /**
     * Display form.
     *
     * @return \Illuminate\Http\Response
     */
    public function index()
    {
        return view('index');
    }

    /**
     * Display a users via search term.
     *
     * @return \Illuminate\Http\Response
     */
    public function search(Request $request)
    {
        $users = [];
        $query = $request->get('query');

        if($query){
            $users = User::select("name")
                        ->where('name', 'LIKE', '%'. $query. '%')
                        ->get();
        }

        return response()->json($users);
    }


}
Explanation
In this UserController, we use the index function to load the Blade view for the live autocomplete search, and the search method to handle AJAX requests for user queries and return the results in JSON format.
Step 7: Create Blade View with Typeahead JS Implementation
Now, create a view file at resources/views/index.blade.php and add the following code:
<!DOCTYPE html>
<html>
<head>
    <title>Laravel 12 Ajax Autocomplete Search using Typeahead JS - ItStuffSolutiotions.io</title>
     <link href="https://cdn.jsdelivr.net/npm/bootstrap@5.3.8/dist/css/bootstrap.min.css" rel="stylesheet">
</head>
<body>

  <div class="container">
    <div class="card mt-5 shadow-sm">
      <h3 class="card-header p-3 text-center">
        Laravel 12 Ajax Autocomplete Search using Typeahead JS - ItStuffSolutiotions.io
      </h3>

      <div class="card-body d-flex justify-content-center p-5">
        <div class="col-12 col-md-4">
          <input type="text" class="form-control typeahead" id="search" placeholder="Search here...">
        </div>
      </div>
    </div>
  </div>

<script src="https://cdnjs.cloudflare.com/ajax/libs/jquery/3.6.0/jquery.min.js"></script>
<script src="https://cdn.jsdelivr.net/npm/bootstrap@5.3.8/dist/js/bootstrap.bundle.min.js"></script>
<script src="https://cdnjs.cloudflare.com/ajax/libs/bootstrap-3-typeahead/4.0.1/bootstrap3-typeahead.min.js"></script>

<script type="text/javascript">

    var URL = "{{ route('search') }}";


    $('#search').typeahead({
            source: function (search_text, process) {

                return $.get(URL, { query: search_text }, function (data) {

                    return process(data);

                });

            }

        });


</script>


</body>
</html>
Explanation
In this Blade file, we used Bootstrap for styling and Typeahead.js for implementing autocomplete search. The following script enables the live search functionality explained below:
- var URL stores the Laravel route (search) that returns search results.
- When you type something in the #search input, Typeahead calls the source function.
- Source function sends an AJAX request ($.get) to the route with URL and user’s input (query) .
- Laravel returns matching results as data in json format.
- process(data) shows those results as autocomplete suggestions in the dropdown.
Read Also : Laravel 12 Bootstrap Multiselect Dropdown with Checkbox Example
Step 7: Run the Application
Finally, run the Laravel development server:
php artisan serve
Now open your browser and visit:
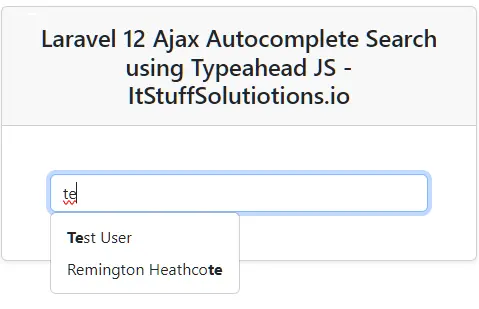
http://127.0.0.1:8000/user-search
Start typing user name, and you’ll see dynamic suggestions appear as you type!.
Conclusion
In this tutorial, we successfully created an autocomplete search feature in Laravel 12 using Typeahead JS and AJAX. This is a simple yet powerful way to improve the user experience of your Laravel applications by providing real-time suggestions from the database.
You can easily customize it for searching products, categories, or any other data in your project.
