
In this Laravel 12 tutorial, we’ll build a full CRUD example in Laravel 12 Summernote image upload with validation for the description field of a Post model. Users will create, list, edit, and delete blog posts. The Post has a title (text) and description (rich text with images). We’ll use a Bootstrap-based Blade form, jQuery validation for required fields. When the form is submitted, any embedded Base64 images in the Summernote content will be extracted, saved to public/uploads/, and the src attributes will be updated to point to those files. This keeps our database lean and URLs valid.
In modern web apps like blogs or CMSs, you often need a rich text editor so users can format text, insert links or images, etc. Summernote is a popular open-source WYSIWYG editor that provides a simple interface for creating rich content.
It supports lists, formatting (bold/italic), links, and image insertion via a familiar toolbar. Notably, Summernote automatically embeds images as Base64 data inside the editor content. This makes client-server transfer easy, but storing raw Base64 blobs in your database can bloat its size. To work around this, we’ll decode those Base64 images in our Laravel app, save them as files in public/, and rewrite the HTML to point to the saved files.
Table of Contents
Let’s walk through each step.
Steps For Laravel 12 Summernote Image Upload CRUD EXample
- Step 1: Install Laravel Project
- Step 2: MySQL Database Configuration
- Step 3: Create Model and Migration
- Step 4: Create Controller and Logic for CRUD
- Step 5: Create Routes for CRUD
- Step 6: Blade Form with Summernote
- Step 7: Run Laravel App
Step 1: Install Laravel Project
First, create a new Laravel 12 application. Ensure you have PHP (≥8.2) and Composer installed. Run the Laravel installer or Composer command:
composer create-project laravel/laravel laravel-summernote-blog
This creates a fresh Laravel project (laravel-summernote-blog). Next, configure your database in the .env file.
Step 2: MySQL Database Configuration
By default Laravel uses SQLite (database/database.sqlite), but we’ll use MySQL. In .env set your database credentials:
DB_CONNECTION=mysql
DB_HOST=127.0.0.1
DB_PORT=3306
DB_DATABASE=laravel
DB_USERNAME=root
DB_PASSWORD=
These environment settings tell Laravel to use MySQL on localhost.
Read Also : Laravel 12 How to Send WhatsApp message using Twilio
Step 3: Create Model and Migration
We need a posts table with title (string) and description (text) fields. Create a model with a migration:
php artisan make:model Post -mcr
This command will generates Migration file like database/migrations/2025_XX_XX_XXXXXX_create_posts_table.php ,Model app/Models/Post.php and resource controller in app/Http/Controllers/PostController.php. Open the migration and define the schema:
<?php

use Illuminate\Database\Migrations\Migration;
use Illuminate\Database\Schema\Blueprint;
use Illuminate\Support\Facades\Schema;

return new class extends Migration
{
    /**
     * Run the migrations.
     */
    public function up(): void
    {
        Schema::create('posts', function (Blueprint $table) {
            $table->id();
            $table->string('title');
            $table->text('description');
            $table->timestamps();
        });
    }

    /**
     * Reverse the migrations.
     */
    public function down(): void
    {
        Schema::dropIfExists('posts');
    }
};
This creates an auto-increment id, a title column, a description column for the rich text, and timestamp fields. Save the migration and run:
php artisan migrate
Your posts table is now created with the appropriate columns.
Next, edit the app/Models/Post.php model. We’ll allow mass assignment on title and description by setting $fillable. Optionally, we can define an Eloquent mutator (setter) to process the description content when it is saved.
⚠ Important: Do not forget to import Illuminate\Database\Eloquent\Casts\Attribute; Laravel won’t throw an error if you omit it, but the setter function description() will not work correctly.
<?php

namespace App\Models;

use Illuminate\Database\Eloquent\Model;
use Illuminate\Database\Eloquent\Casts\Attribute;

class Post extends Model
{
    /**
 * Get the user that owns the post.
 */
      protected $fillable = [
        'title',
        'description',
    ];

    protected function description(): Attribute
    {
        return Attribute::make(
            set: fn (string $value) => $this->makeDescriptionContent($value),
        );
    }
     /**
     * Write code on Method
     *
     * @return response()
     */
    public function makeDescriptionContent($content)
    {
        $description=$content;
        $dom = new \DomDocument();
        @$dom->loadHtml($description, LIBXML_HTML_NOIMPLIED | LIBXML_HTML_NODEFDTD);
        $images = $dom->getElementsByTagName('img');

        foreach($images as $k => $img){
            $data = $img->getAttribute('src');
               // Check if image is base64
            if (strpos($data, 'data:image/') === 0)
            {

            list($type, $data) = explode(';', $data);
            list($type, $data) = explode(',', $data);
            $data = base64_decode($data);

            $image_name= "/uploads/" . time().$k.'.png';
            $path = public_path() . $image_name;

            file_put_contents($path, $data);


            $img->removeAttribute('src');
            $img->setAttribute('src', $image_name);
            }
        }

        $description = $dom->saveHTML();
        return $description;
    }

}
Here we use PHP’s DOMDocument to locate all tags. If the src is a Base64 data URL, we decode it and save it to public/uploads/, then update the src to the new file path (e.g. /uploads/123456.png). This way, whenever you do Post::create or update the description , images are automatically processed.. Note that we also added $fillable = [‘title’,’description‘] so Laravel will allow mass assignment on those fields.
Step 4: Create Controller and Logic for CRUD
Now Open the app/Http/Controllers/PostController.php and add methods:
<?php

namespace App\Http\Controllers;

use App\Models\Post;
use Illuminate\Http\Request;

class PostController extends Controller
{
    /**
     * Display a listing of the resource.
     */
    public function index()
    {
        $posts = Post::latest()->get();
        return view('post.index', compact('posts'));
    }

    /**
     * Show the form for creating a new resource.
     */
    public function create()
    {
        return view('post.create');
    }

    /**
     * Store a newly created resource in storage.
     */
    public function store(Request $request)
    {
        $request->validate([
             'title' => 'required',
             'description' => 'required'
        ]);


        Post::create([
            'title' => $request->title,
            'description' => $request->description
            ]);

        return redirect()->route('post.index')->withSuccess( 'Post created successfully');


    }

    /**
     * Display the specified resource.
     */
    public function show(Post $post)
    {
        return view('post.show', compact('post'));
    }

    /**
     * Show the form for editing the specified resource.
     */
    public function edit(Post $post)
    {
        return view('post.edit', compact('post'));
    }

    /**
     * Update the specified resource in storage.
     */
    public function update(Request $request, Post $post)
    {
        $request->validate([
             'title' => 'required',
             'description' => 'required',
             'deleted_images' => 'nullable|string'
        ]);

         // decode deleted images
        $deletedImages = json_decode($request->deleted_images, true) ?? [];

        // delete files
        if(count($deletedImages)>0){
            foreach ($deletedImages as $path) {
                $file = public_path(parse_url($path, PHP_URL_PATH));
                if (file_exists($file)) {
                    unlink($file);
                }
            }
        }


        $post->update([
            'title' => $request->title,
            'description' => $request->description
        ]);
        return redirect()->route('post.index')->with('success', 'Post updated successfully');
    }


    /**
     * Remove the specified resource from storage.
     */
    public function destroy(Post $post)
    {
       $dom = new \DOMDocument();
        libxml_use_internal_errors(true);
        $dom->loadHtml($post->description, LIBXML_HTML_NOIMPLIED | LIBXML_HTML_NODEFDTD);
        $images = $dom->getElementsByTagName('img');

        foreach($images as $img) {
            $src = $img->getAttribute('src');
            if (strpos($src, '/uploads/') === 0) {
                $imagePath = public_path() . $src;
                if (file_exists($imagePath)) {
                    unlink($imagePath);
                }
            }
        }
        $post->delete();
        return redirect()->route('post.index')->with('success', 'Post deleted successfully');
    }

}
We validate the request ($request->validate) to ensure title and description are present. In store and update, we call Post::create or $post->update.
In store and update, we call Post::create or $post->update. Thanks to our model’s body mutator, any Base64 images in $request->description are automatically decoded and saved. After actions we redirect with a success message.
Step 5: Create Routes for CRUD
In routes/web.php, define routes for all CRUD actions. We used Resource Controller ,This single line creates the standard index, create, store, show, edit, update, destroy routes. These routes correspond to listing (index), showing the create form (create), saving a new post (store), editing, updating, and deleting posts.
<?php

use Illuminate\Support\Facades\Route;

use App\Http\Controllers\PostController;


Route::resource('post', PostController::class);
Step 6: Blade Form with Summernote
Next, let’s create the view for adding a new post. We’ll use Bootstrap for styling and include Summernote via CDN and we created a master layout File for views resources/views/layouts/app.blade.php.
<!DOCTYPE html>
<html lang="{{ str_replace('_', '-', app()->getLocale()) }}">
<head>
<meta charset="utf-8">
<meta name="viewport" content="width=device-width, initial-scale=1">
<title>Laravel 12 Summernote Image Upload CRUD Example - ItStuffSolutions</title>
<link href="https://cdn.jsdelivr.net/npm/bootstrap@5.1.3/dist/css/bootstrap.min.css" rel="stylesheet">
<link href="https://cdn.jsdelivr.net/npm/summernote@0.8.20/dist/summernote.min.css" rel="stylesheet">
<style>
/* Fix fullscreen covering issue */
.note-editor.note-frame.fullscreen {
z-index: 999 !important; /* ensure it sits above everything */
position: fixed !important;
top: 0; left: 0; right: 0; bottom: 0;
width: 100% !important;
height: 100% !important;
background: #fff; /* optional: white background */
}
.note-editor.note-frame .note-toolbar {
background-color: #f8f9fa; /* light gray like Bootstrap navbar */
border-bottom: 1px solid #dee2e6;
padding: 0.5rem 0.75rem;
border-radius: 0.375rem 0.375rem 0 0; /* rounded corners top only */
}
.note-editor.note-frame .note-statusbar {
border-top: 1px solid #dee2e6;
}
/* Fix Summernote modal header for Bootstrap 5 */
.note-modal .modal-header {
padding: 0.75rem 1rem;
background-color: #f8f9fa; /* light background like toolbar */
border-bottom: 1px solid #dee2e6;
border-top-left-radius: 0.375rem;
border-top-right-radius: 0.375rem;
}
.note-modal .modal-title {
font-weight: 500;
font-size: 1rem;
color: #212529; /* Bootstrap text color */
}
.note-modal .btn-close {
padding: 0.25rem 0.5rem;
margin: -0.25rem -0.5rem -0.25rem auto;
}
</style>
</head>
<body>
<div class="container my-4">
<div class="row justify-content-center">
<div class="col-md-10 ">
@yield('content')
</div>
</div>
</div>
<script src="https://code.jquery.com/jquery-3.6.0.min.js"></script>
<script src="https://cdn.jsdelivr.net/npm/bootstrap@5.1.3/dist/js/bootstrap.bundle.min.js"></script>
<script src="https://cdn.jsdelivr.net/npm/summernote@0.8.20/dist/summernote.min.js"></script>
<script src="https://cdn.jsdelivr.net/npm/jquery-validation@1.19.5/dist/jquery.validate.min.js"></script>
<script>
$(document).ready(function() {
let deletedImages = [];
$('#editor').summernote({
placeholder: 'Write here...',
tabsize: 2,
height: 420 ,
dialogsInBody: true,
popover: {
image: [
['image', ['resizeFull', 'resizeHalf', 'resizeQuarter', 'resizeNone']],
['float', ['floatLeft', 'floatRight', 'floatNone']],
['remove', ['removeMedia']] // Ensure 'removeMedia' is included
],
link: [
['link', ['linkDialogShow', 'unlink']]
],
table: [
['add', ['addRowDown', 'addRowUp', 'addColLeft', 'addColRight']],
['delete', ['deleteRow', 'deleteCol', 'deleteTable']]
],
air: [
['color', ['color']],
['font', ['bold', 'underline', 'clear']],
['para', ['ul', 'paragraph']],
['table', ['table']],
['insert', ['link', 'picture']]
]
},
callbacks: {
onInit: function() {
// Fix dismiss attributes for Bootstrap 5
$('.note-modal [data-dismiss="modal"]')
.attr('data-bs-dismiss', 'modal')
.removeAttr('data-dismiss');
},
onImageUpload: function(image)
{
var sizeKB = image[0]['size'] / 1000;
var tmp_pr = 0;
if(sizeKB > 200){
tmp_pr = 1;
alert("pls, select less then 200kb image.");
}
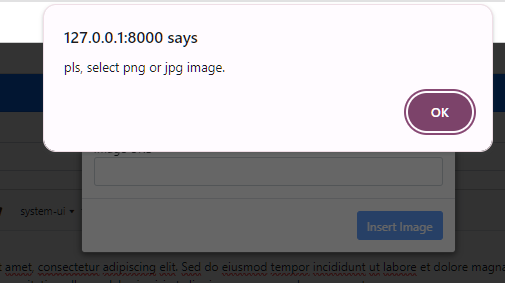
if(image[0]['type'] != 'image/jpeg' && image[0]['type'] != 'image/png'){
tmp_pr = 1;
alert("pls, select png or jpg image.");
}
if(tmp_pr == 0){
var file = image[0];
var reader = new FileReader();
reader.onloadend = function() {
var image = $('<img>').attr('src', reader.result);
$('#editor').summernote("insertNode", image[0]);
}
reader.readAsDataURL(file);
}
},
@stack('scripts')
},
});
$("#blog").validate({
ignore: [], // Do not ignore hidden fields (so Summernote is validated)
rules: {
title: { required: true },
description: { required: true }
},
messages: {
title: { required: "Please enter a title" },
description: { required: "Please enter the description content" }
},
errorElement: 'div',
errorClass: 'invalid-feedback',
highlight: function(element) {
$(element).closest('.form-group').addClass('is-invalid');
},
unhighlight: function(element) {
$(element).closest('.form-group').removeClass('is-invalid');
},
// Optional: Custom error placement for Summernote
errorPlacement: function(error, element) {
if (element.hasClass('summernote')) {
error.insertAfter(element.siblings('.note-editor'));
error.addClass('d-block');
} else {
error.insertAfter(element);
}
},
});
});
</script>
</body>
</html>
We overrode the default Summernote CSS because it is not fully compatible with Bootstrap 5.1.3, so we made the necessary adjustments. We also wrote custom jQuery code to handle some JavaScript functionalities that Summernote does not support out of the box.
Summernote works seamlessly with Bootstrap 3.1.1, but since we are using Bootstrap 5.1.3, these changes were required. Additionally, we implemented image upload validation using jQuery to check file size and type. The form with the ID blog is used to validate both the title and description fields via jQuery.
The code was written inside the onInit function to ensure the Summernote popup closes properly, as it was not working by default. The Summernote editor has the ID editor.
We used @stack('scripts') to add jquery when required.
create resources/views/post/create.blade.php File and add the code given below:
@extends('layouts.app')
@section('content')
<div class="card card-primary mt-3" >
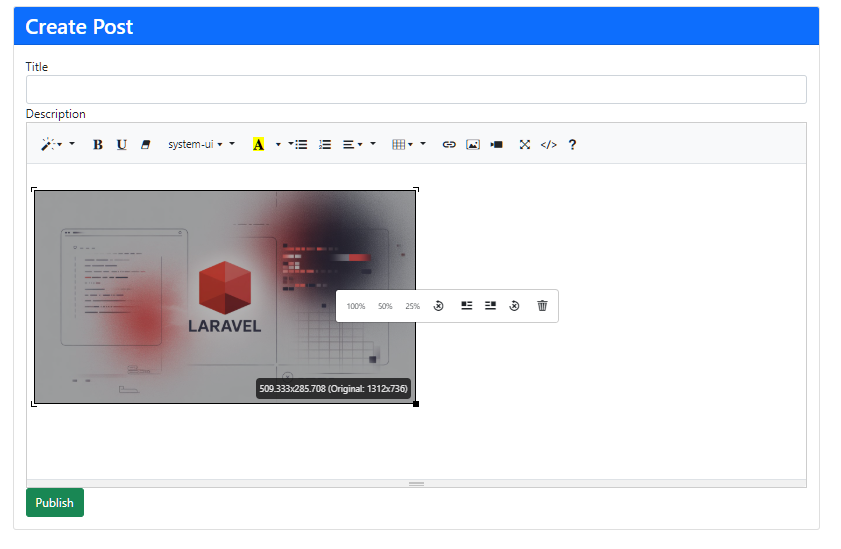
<div class="card-header bg-primary text-white">
<h3 class="mb-0">Create Post</h3>
</div>
<div class="card-body">
@if ($errors->any())
<div class="alert alert-danger">
<ul class="mb-0">
@foreach ($errors->all() as $error)
<li>{{ $error }}</li>
@endforeach
</ul>
</div>
@endif
<form method="post" action="{{ route('post.store') }}" enctype="multipart/form-data" id="blog">
@csrf
<div class="form-group">
<label>Title</label>
<input type="text" name="title" class="form-control" value="{{ old('title') }}"/>
</div>
<div class="form-group">
<label>Description</label>
<textarea id="editor" name="description" class="form-control">{{ old('description') }}</textarea>
</div>
<div class="form-group">
<button type="submit" class="btn btn-success btn-block">Publish</button>
</div>
</form>
</div>
</div>
@endsection
In create.blade.php, we used a form containing a title input and a Summernote textarea, along with jQuery validation, as discussed in app.blade.php.
Create resources/views/post/index.blade.php File :
We include Summernote’s CSS and JS (Bootstrap 5.1.3) and initialize it on document ready. The form uses a POST to post.store, and has enctype=”multipart/form-data” (needed if images were uploaded via file, though Summernote embeds as Base64 by default). The @csrf directive includes a CSRF token. This view and asset setup follows common examples.
In this Blade view, we display the list of posts along with buttons to view, edit, and delete each post.
@extends('layouts.app')
@section('content')
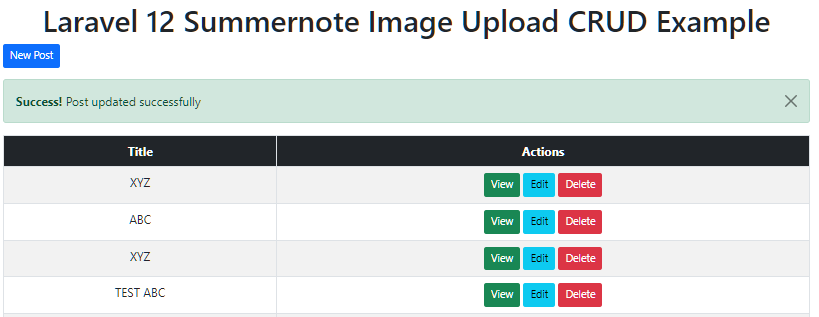
<h1 class="text-center">Laravel 12 Summernote Image Upload CRUD Example</h1>
<a href="{{ route('post.create') }}" class="btn btn-primary btn-sm" style="margin-bottom:15px;">
New Post
</a>
@session('success')
<div class="alert alert-success alert-dismissible fade show">
<strong>Success!</strong> {{ $value }}
<button type="button" class="btn-close" data-bs-dismiss="alert" aria-label="Close"></button>
</div>
@endsession
<table class="table table-striped table-bordered table-hover text-center">
<thead class="bg-dark">
<tr>
<th class="text-center text-white">Title</th>
<th class="text-center text-white">Actions</th>
</tr>
</thead>
<tbody>
@foreach($posts as $post)
<tr>
<td>{{ $post->title }}</td>
<td>
<!-- View button -->
<a href="{{ route('post.show', $post) }}" class="btn btn-sm btn-success">
View
</a>
<a href="{{ route('post.edit', $post) }}" class="btn btn-sm btn-info">Edit</a>
<!-- Delete button -->
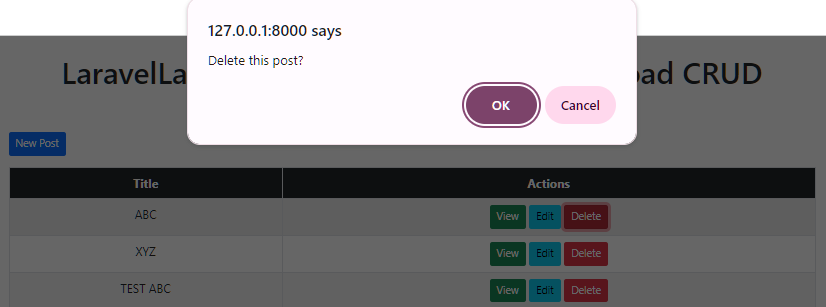
<form action="{{ route('post.destroy', $post) }}" method="POST" style="display:inline;" onsubmit="return confirm('Delete this post?');">
@csrf
@method('DELETE')
<button class="btn btn-sm btn-danger"> Delete</button>
</form>
</td>
</tr>
@endforeach
</tbody>
</table>
@endsection
When the Delete button is clicked, a confirmation alert saying “Delete this post?” will appear. If you press OK, the post will be deleted.
Create resources/views/post/edit.blade.php File and add the code given below:
@extends('layouts.app')
@section('content')


            <div class="card card-primary mt-3" >
                <div class="card-header bg-primary text-white">
                    <h3 class="mb-0">Create Post</h3>
                </div>
                <div class="card-body">

                    @if ($errors->any())
                        <div class="alert alert-danger">
                            <ul class="mb-0">
                                @foreach ($errors->all() as $error)
                                    <li>{{ $error }}</li>
                                @endforeach
                            </ul>
                        </div>
                    @endif
            <form method="post" action="{{ route('post.update', $post) }}" enctype="multipart/form-data" id="blog">
                @csrf
                @method('PUT')

                <div class="form-group">
                    <label>Title</label>
                    <input type="text" name="title" class="form-control"   value="{{ old('title', $post->title) }}" />
                </div>
                <div class="form-group">
                    <label>Description</label>
                    <textarea id="editor" name="description">{{ old('description', $post->description) }}</textarea>
                </div>
                 <input type="hidden" id="deleted_images" name="deleted_images">

                <div class="form-group mt-2">
                    <button type="submit" class="btn btn-success btn-block">Publish</button>
                </div>
            </form>
        </div>
    </div>

    @push('scripts')
      onMediaDelete : function(target) {
            let imagePath = target[0].src;

            deletedImages.push(imagePath);

            // Update hidden input
            $('#deleted_images').val(JSON.stringify(deletedImages));
              }
    @endpush
    @endsection
The edit form is similar to the create form, but pre-fills the fields. We used the onMediaDelete function in Summernote to track deleted images. When an image is deleted, this function saves its path in a hidden field named deleted_images in JSON format. When the user updates the post, we fetch the deleted_images field, and if it is not null, we locate and remove the images deleted by the user.
This edits an existing Post (passed as $post). We set method=”POST” with @method(‘PUT’) for the HTTP PUT update. The fields are populated with the existing values. The rest (scripts, Summernote init, validation) are same as the create view.
create resources/views/post/show.blade.php File and add the code given below:
@extends('layouts.app')

@section('content')
<div class="container my-4">
    <div class="row justify-content-center">
        <div class="col-md-10">

            <div class="card shadow-sm">
                <div class="card-header bg-primary text-white">
                    <h3 class="mb-0">{{ $post->title }}</h3>
                </div>
                <div class="card-body">
                    {!! $post->description !!}
                </div>
            </div>

            <a href="{{ route('post.index') }}" class="btn btn-secondary mt-3">Back to Posts</a>

        </div>
    </div>
</div>
@endsection
Step 7: Run Laravel App
After completing all the setup steps, you can start the application server by executing the following command:
php artisan serve
Next, open your web browser and navigate to:
http://127.0.0.1:8000/post
This will take you to the posts index page. To create a new post, simply click the “New Post” button.
Conclusion
We’ve built a complete Laravel 12 tutorial demonstrating how to integrate the Summernote WYSIWYG editor with image upload support. The key steps were:
- Installing Laravel 12 and configuring the database
- Creating a Post model and migration with title and description fields
- Building a Blade form that includes Summernote for rich text editing.
- Using jQuery Validation to ensure the title and body aren’t empty.
- Handling the Base64-encoded images by decoding and saving them in public/uploads/ and updating the HTML
- Implementing full CRUD routes and controller actions for creating, listing, editing, and deleting posts.
This pattern (Summernote + Laravel CRUD) is common in blogs or content management systems. By following Laravel best practices (such as mass assignment protection, using named routes, Blade templates, and Eloquent models), we ensure a clean and maintainable codebase. As shown, Summernote works well with Laravel when you decode and store images properly.
